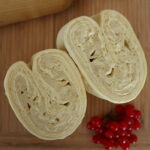
Danish pastry dough
Whether croissants, pudding pretzels or Franzbrötchen – from yeast puff pastry dough can conjure up many delicacies. You can make Danish pastry dough at home using this recipe. In addition, you will learn how to make it vegan, how to store it, and what you can make from it.
Servings 10 pastry pieces
Ingredients
- 250 g butter cold
- 250 ml milk room-warm
- 1 egg
- 50 g butter room-warm
- 30 g sugar
- approx. 520 g flour
- 21 g fresh yeast
- 1 tsp salt
- flour for the work surface
Instructions
- Dissolve fresh yeast and sugar in room-warm milk.
- Add softened butter, egg and salt and mix coarsely.
- Add flour in batches and knead into a soft, slightly sticky dough. Knead the dough for about 10 minutes so that it becomes elastic and smooth, and chill it, covered, for 2 hours to rise.
- Fold the baking paper into an envelope about 20 cm x 20 cm, put 250 g of cold butter cut into thin slabs and roll it out with a rolling pin so that it is evenly distributed in the envelope. Put the butter plate in the envelope also in the refrigerator while the dough is rising.
- On a floured work surface, roll out the dough into a rectangle about 21 cm x 41 cm (that is, slightly larger than twice the size of the butter plate).
- Take the butter plate out of the baking paper envelope and place it on one side of the dough rectangle, leaving a border about 1 cm wide. Cover the butter plate with the second half of the dough and press the edge of the dough firmly on all sides.
- Roll out the buttered dough into a long rectangle, fold in one of the shorter sides of the rectangle about 2/3 and its second side about 1/3 to the center, and glue the two sides together. Now fold the dough from the two folded sides together like a book, wrap it in baking paper or plastic wrap and chill it for 30 minutes.
- Roll the dough sheet back out on the floured work surface into a long rectangle, fold one of the shorter sides of the square in half on the center, and place the second short side over it. Wrap the dough sheet in baking paper or plastic wrap and refrigerate for 30 minutes. Repeat this step once or twice more, depending on the recipe.
- Now form pastries from the finished Danish pastry dough, depending on the recipe. Let the pastries rise at room temperature until they have visibly increased in size, and bake them.
Notes
- The amount of flour given can always vary. Therefore, add the flour in portions until the dough reaches the right consistency. It should be very soft, not mushy, but not dry or too firm either.
- Do not roll the dough too thin when touring so that the butter does not run out.
- If air has collected in the dough during rolling and air bubbles have formed on the surface, you can carefully make small holes in the dough with a toothpick and let the air out.
- When touring the dough, make sure that the fold of the rectangle on the work surface is on the same side each time it is rolled out and folded.
- Each time, remove the excess flour from the dough with a pastry brush before folding it so that it holds together well.
- It is important to chill the dough well after each turn so that the drawing fat does not melt and leak.
- Note the detailed tips and tricks for making the Danish pastry dough at the top of the post.