
Dieser Beitrag ist auch verfügbar auf:
![]() Deutsch
Deutsch
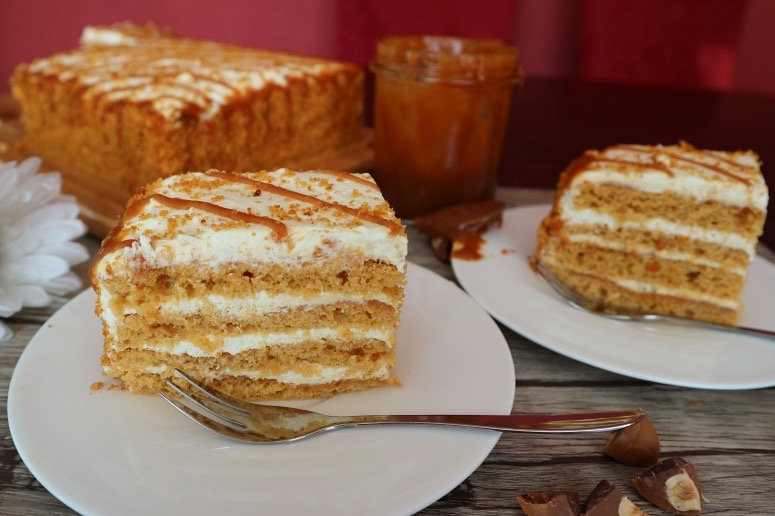
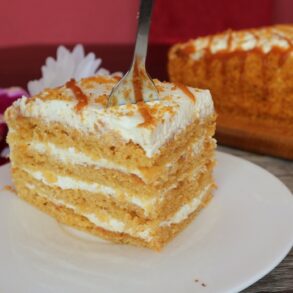
Fluffy caramel dough, airy cream and aromatic caramel sauce – all this is combined in the Russian cake “Caramel girl”. It tastes soft, creamy, delicate, airy and very caramel. It is not without reason that the cake is so popular.
It is very easy to make this delicious caramel cake yourself. Here I show you how to do it. A detailed recipe for Russian caramel cake with exact quantities and step-by-step instructions is here below.
Sister of the Russian cake “Milk girl”
The “Caramel girl” cake can be seen as the sister of the popular Russian cake “Milk girl”. They are somewhat similar in taste and preparation, but there are some differences.
The dough for the “Caramel girl” is prepared not with ordinary sweetened condensed milk as in the “Milk girl”, but with caramelized. The cream for the cake “Caramel girl” is additionally supplemented with caramel sauce.

Without rolling out the cake layers
Although the Russian caramel cake, like so many other Russian cakes, consists of several thin layers, it does not require the tedious rolling out of the cake layers. Thus, this cake can be prepared much faster.
Since the dough is thick, it is simply spread on the baking sheet, baked and then cut into several pieces. You’re sort of making several cake layers on one baking sheet at the same time.
Alternatively, you can make the cake round instead of square. To do this, either draw a circle on the baking paper (as big as the cake should be) or put the edge of a springform pan, spread the dough thinly in this circle and then bake it (remove the edge from the springform pan before baking).
You would have to repeat the procedure again and again until all the dough is used up and you have baked all the cake layers. This way, however, the cake layers will take longer to bake than if you make the cake square.
Delicious caramel cake – easy recipe
Russian cake “Caramel girl” is not only incredibly delicious, but easy and quick to make.
Preparing the cake layers is pretty quick: mix all the ingredients and bake briefly on a baking sheet.
For the cream, all you have to do is whip the cream and powdered sugar together.
Preparing the caramel sauce also doesn’t take much effort. But you can make the caramel sauce yourself in advance in stock.
So your caramel cake is ready in no time.
Use ready-made caramel sauce for the cake
Of course, you can use a caramel sauce from the supermarket for the cake. You’ll need about 200 grams of caramel sauce for the recipe below.
However, homemade caramel sauce tastes much better than store-bought. Also, it does not contain any additives or preservatives that have no place in food.
How to serve cake “Caramel girl”
Russian caramel cake is an eye-catcher on the dining table and tastes irresistibly delicious. It is not only an ideal after-dinner dessert with coffee or tea, but is perfect for any celebration, for example, Christmas, Easter, birthday or Mother’s Day.
Also as a sweet gift, it is guaranteed to delight any recipient – especially anyone with a sweet tooth.
The cake tastes even better the next day and the next few days. So you can also make it a few days earlier before serving.
This caramel cake is
- creamy,
- tender,
- airy,
- smooth,
- very caramel,
- naturally delicious,
- even more delicious the next day,
- with homemade caramel sauce,
- easy and quick to make without rolling out the cake layers,
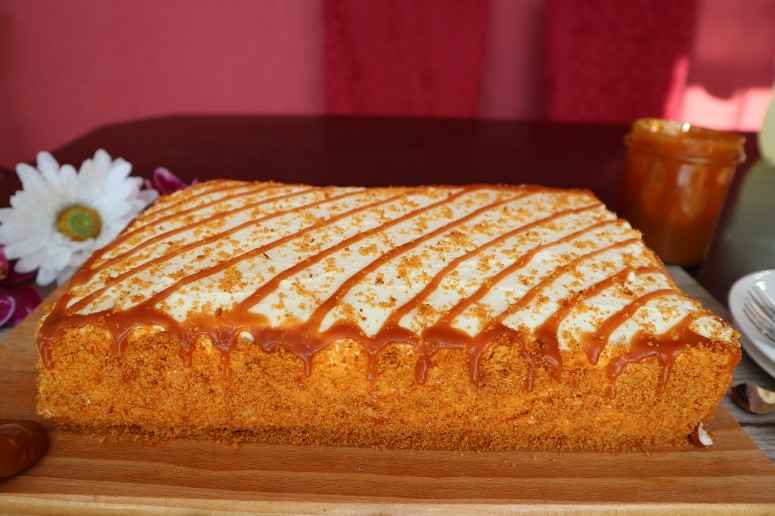
- about 20 x 30 cm in size.
How to make Russian caramel cake yourself: the recipe
You can find the exact quantities and step-by-step instructions for making the Russian “Caramel girl” cake yourself in the box recipe below.
For the cake layers you need
- caramelized sweetened condensed milk,
- butter,
- eggs,
- baking powder
- and flour.
Butter must be melted and cooled. Do not put it into the dough while it is hot.
For the cream you need
- cream
- and powdered sugar.
For the caramel sauce you also need
- cream,
- sugar,
- butter
- and a little salt.
How to make Russian caramel cake: this is how it goes
- For the dough, mix caramelized sweetened condensed milk and eggs.
- Add melted and cooled butter and stir.
- Add flour and baking powder and mix until a thick batter forms.
- Divide the dough into two equal portions, spread each portion thinly on a baking sheet lined with baking paper and bake at 180 °C for about 7 minutes each. Let the cake layers cool, cut a narrow edge off all sides on each and crumble. Cut each of the two cake layers into two equal parts.
- For the cream, whip cream and powdered sugar until stiff.
- For the caramel sauce, heat cream. Melt sugar in a pan to a caramel-colored liquid, add butter, then salt, followed by hot cream. Boil the caramel sauce for about 4 minutes and let cool.
- Drizzle all four cake layers with caramel sauce, then spread with the cream and stack on top of each other. Sprinkle the cake with the crumbs and refrigerate for a few hours. Done!
Alternative creams for the Russian caramel cake
There are other alternative creams for the “Caramel girl” cake, with which it is made. Here I show you two more recipes for the cream, which you can try according to your taste.
Cream with sour cream and coffee for the cake “Caramel girl”
Don’t like a creamy custard? Do you want a slightly tart flavor in the cream? Then try this alternative cream with sour cream and coffee for the cake. You won’t need a caramel sauce.
For this you need:
- 750 g sour cream,
- 90 g powdered sugar,
- 5 g instant coffee,
- vanilla.
Mix sour cream, powdered sugar, instant coffee and vanilla to a homogeneous mass. The cream is ready! Prepare the cake layers exactly as described in the recipe and then spread each of them with this sour cream and coffee cream.
Cream with caramelized sweetened condensed milk
Needed are:
- 400 g cream,
- 310 g caramelized sweetened condensed milk.
Just whip cream and caramelized sweetened condensed milk until creamy, and your cream is ready.
Even with this cream, you don’t need a caramel sauce for the cake. You make the cake layers again as it says in the recipe below, and spread the cream on each cake layer.
I’ve already tried the cake with the two alternative creams as well, and I think both the original cake with cream and caramel sauce and the version with the sour cream coffee cream and cream condensed milk cream are delicious.
If you’ve made all the variations, tell me in a comment below which one you liked best.

How to make your “Caramel girl” perfect: tips and tricks
- For the dough, you might need a little more or less flour than indicated in the ingredient list, as each type of flour absorbs liquid differently. The dough should be thick, i.e. not too runny and not too solid. Therefore, first take a little less flour and mix it with baking powder. When stirring the dough, simply add more flour if it is too liquid.
- Sift the flour with the baking powder to avoid lumps in the dough.
- Do not use the melted butter hot for the dough, but let it cool down first.
- In order to check whether the cake base is baked, you should do a chopstick test. To do this, insert a toothpick briefly into the center of the cake bas and see if it stays almost clean after it comes out. If the toothpick stays smeared in raw dough, you still need to bake the cake base. If only a few moist crumbs remain on the toothpick, the cake base is ready. If the toothpick comes out dry, it could be that you baked the cake base too long and it tastes too dry in the end. Alternatively, you can test whether the cake base is ready as follows: Gently press the surface of the dough with a finger in the middle for a short time. If the cake base springs back after pressing and no traces remain visible, it is ready.
- Be sure to let the cake base cool on a flat, even surface.
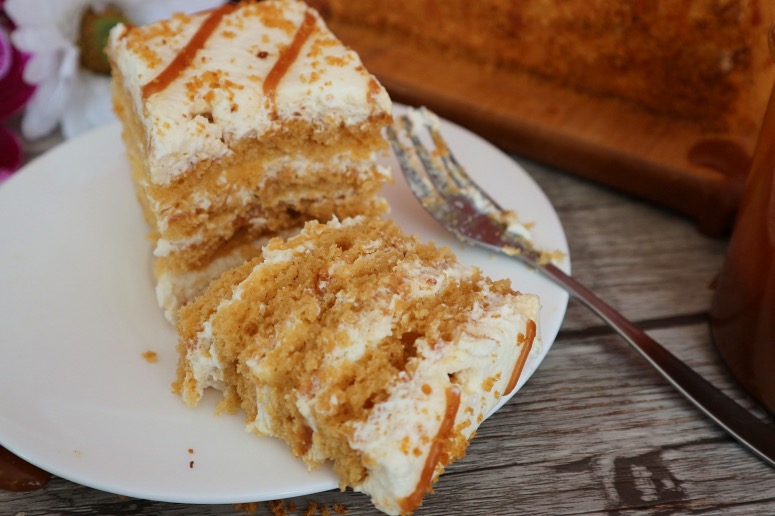
- You’ve done a perfect job with the dough if, when cut into multiple cake base after baking, it looks very fluffy with lots of little holes in the cut.
- You can also cut the two cake layers into four pieces each. Then your cake consists of 8 cake layers, is much higher and about 15 x 20 cm in size. For my taste, the cake is then too high. But you can do it the way you like it best.
- Cream for the cream should be cold before whipping.
- You can adjust the amount of powdered sugar for the cream to your taste, depending on how sweet you like the cake.
- You will hardly taste the salt in the caramel sauce. It ensures that the sauce tastes distinctly of caramel and not too sweet. However, you can change the amount of salt to your taste.
- Use a wooden spoon to stir the sugar for the caramel sauce in the pan.
- It is important not to let the sugar for the caramel sauce burn, otherwise the sauce will taste bitter later.
- If you have some lumps formed in the caramel sauce after adding the cream, it’s not a problem. They will dissolve again when you heat the sauce.
- To get the right consistency of the caramel sauce, you better use a kitchen thermometer.
- It’s best to make a double batch of caramel sauce right away. Because it is incredibly delicious, you can eat the rest yourself. For example, it tastes delicious on ice cream, pastries or bread. The ingredients in the recipe below make about 220 g of caramel sauce, which you need for the cake.
- Store the homemade caramel sauce in the refrigerator if you do not use it immediately. It will keep for about two weeks.
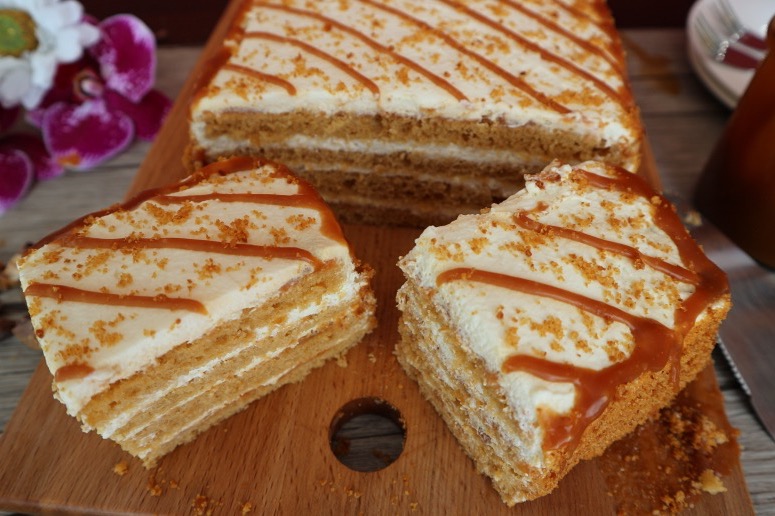
- Decorate the cake any way you like with the caramel sauce and pastry crumbs. I used the sauce to draw stripes diagonally across the cake and a border around the top of the cake. I scattered some crumbs between the caramel stripes.
- Like most Russian cakes, this one tastes even better over the next few days.
Did you make the Russian caramel cake using this recipe? I’m looking forward to your result, your star rating and your comment on the recipe below, how it turned out and tasted to you.
Not enough of delicious Russian cakes? Try also:
- Napoleon cake – classic recipe for popular Russian layer cake
- Medovik – classic recipe for popular Russian honey cake
Cake "Caramel girl" (Russian caramel cake)
Ingredients
for the dough
- 380 g caramelized sweetened condensed milk
- 100 g butter (melted and cooled)
- 2 eggs
- 1 pinch of salt
- 10 g baking powder
- approx. 160 g flour
for the cream
- 420 g cream (cold)
- 40 g powdered sugar
for the caramel sauce
- 165 g cream
- 150 g sugar
- 30 g butter
- 1/2 tsp salt
Instructions
Preparation of the dough
- Mix caramelized sweetened condensed milk, eggs and salt to a homogeneous mass.
- Add melted and cooled butter and mix again until homogeneous.
- Mix flour and baking powder, add it to the liquid mass from the previous step and mix it into a thick dough. The dough should not be too liquid and not solid. Use a little less flour at first and add some more as needed to give the dough the right consistency. (For this, follow the tips and tricks for making the dough here at the top of the post).
- Divide the dough into two equal portions, first spread one of the portions thinly on a baking sheet lined with baking paper and bake it in a preheated oven at 180 °C for about 7 minutes. Repeat the same with the second portion of the dough and let the two cake layers cool.
- Cut off about 0.5 - 1 cm wide edges from all four sides of the two cake layers, let these edges dry in the warm, turned-off oven until they turn golden brown, and then crumble them finely.
- Cut each of the two cake layers into two squares of the same size, so that you have four cake layers.
Preparation of the cream
- Whip the cream and powdered sugar until stiff.
Preparation of the caramel sauce
- Put cream in a saucepan and heat it, but do not boil it.
- Spread sugar evenly on the bottom of a non-stick pan and heat it over medium heat until it starts to melt and brown caramel spots form on the surface, without stirring it.
- Once the sugar melts, and brown caramel flecks form on the surface, stir it gently with a wooden spoon over and over until it has completely dissolved into a light caramel-colored liquid, and remove the pan from the heat.
- Immediately add butter and stir it until it melts and the mixture becomes homogeneous.
- Now add salt and stir it briefly.
- Add the hot cream in small portions, stirring constantly until the caramel is homogeneous (a few lumps are not a problem, they will dissolve during cooking).
- Place the caramel mixture back on the stove, bring to a boil while stirring constantly, and then cook, stirring, until it reaches 108 °C, about 4 minutes.
- Remove the pan from the heat, immediately pour the caramel sauce into a clean mixing bowl and let it cool.
Preparation of the cake
- Draw stripes of the caramel sauce on all the cake layers, for example using a piping bag with a thin hole nozzle. Or you can simply sprinkle the cake layers with the caramel sauce.
- Now spread all four cake layers with the cream by spreading it on the caramel sauce and stack them on top of each other.
- Brush the edges of the cake with the cream, sprinkle the crumbs around the edges, and decorate as desired with the remaining caramel sauce. Chill the caramel cake for 2 - 3 hours or overnight.
Notes
- The specified amount of flour may vary. The dough should be thick.
- In no case add the melted butter hot to the dough.
- Use cold cream for the cream.
- Salt in the caramel sauce provides a distinct caramel flavor.
- Do not burn sugar for the caramel sauce, otherwise the sauce will taste bitter later.
- Note the detailed tips and tricks for DIY Russian caramel cake at the top of the post.